Fabrication
Making things or things that were made.
United’s Magic Trays
@United has new coach trays that are coated with a material that has an amazing coefficient of friction. They are not sticky at all—there’s no adhesion effect—it is all friction. Even low surface energy plastics don’t slide on it at all.
The approximately 75-80° angle in the picture is the point at which the cup topples over itself. It isn’t adhered to the surface and it doesn’t appear to slide at all before toppling.
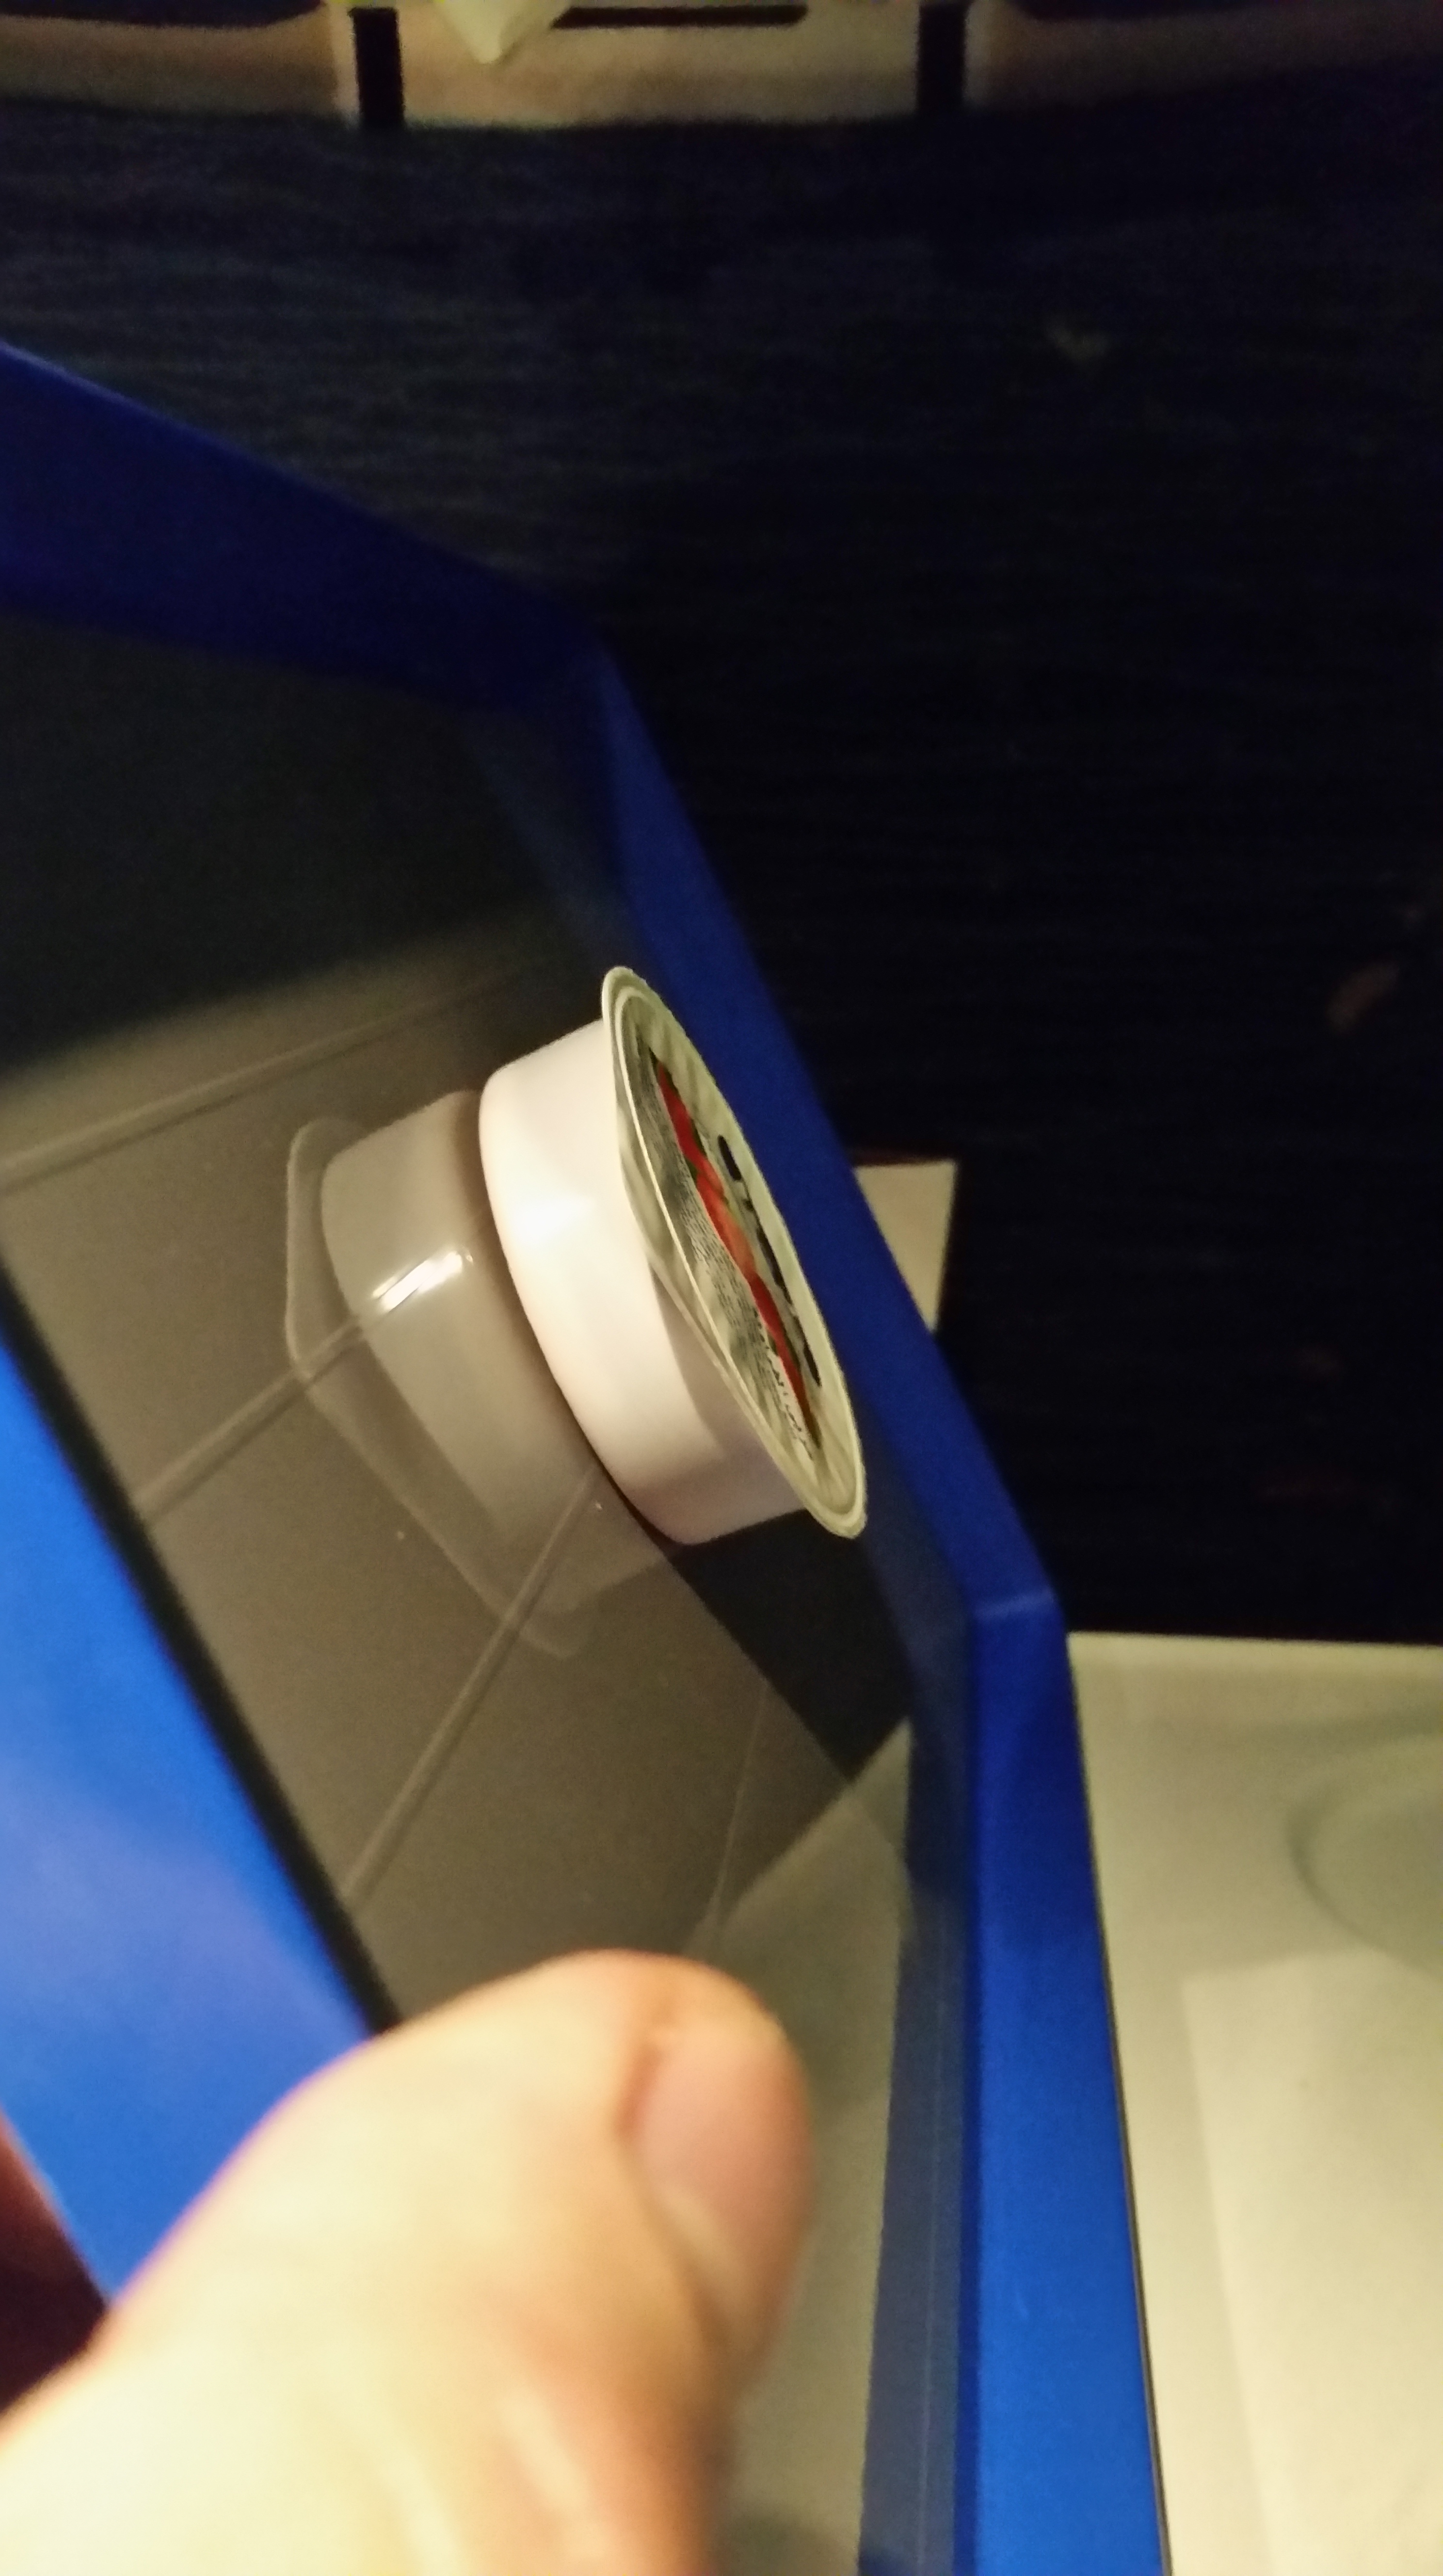
This would be the perfect coating for a smart phone pad in a car. I never managed to find out who made it.
Low Voltage LED Lighting
My kitchen has had halogen lighting for 20 years, from back when it was a slightly more efficient choice than incandescent lighting and had a pleasing, cooler (bluer, meaning the filament runs hotter) color temperature.
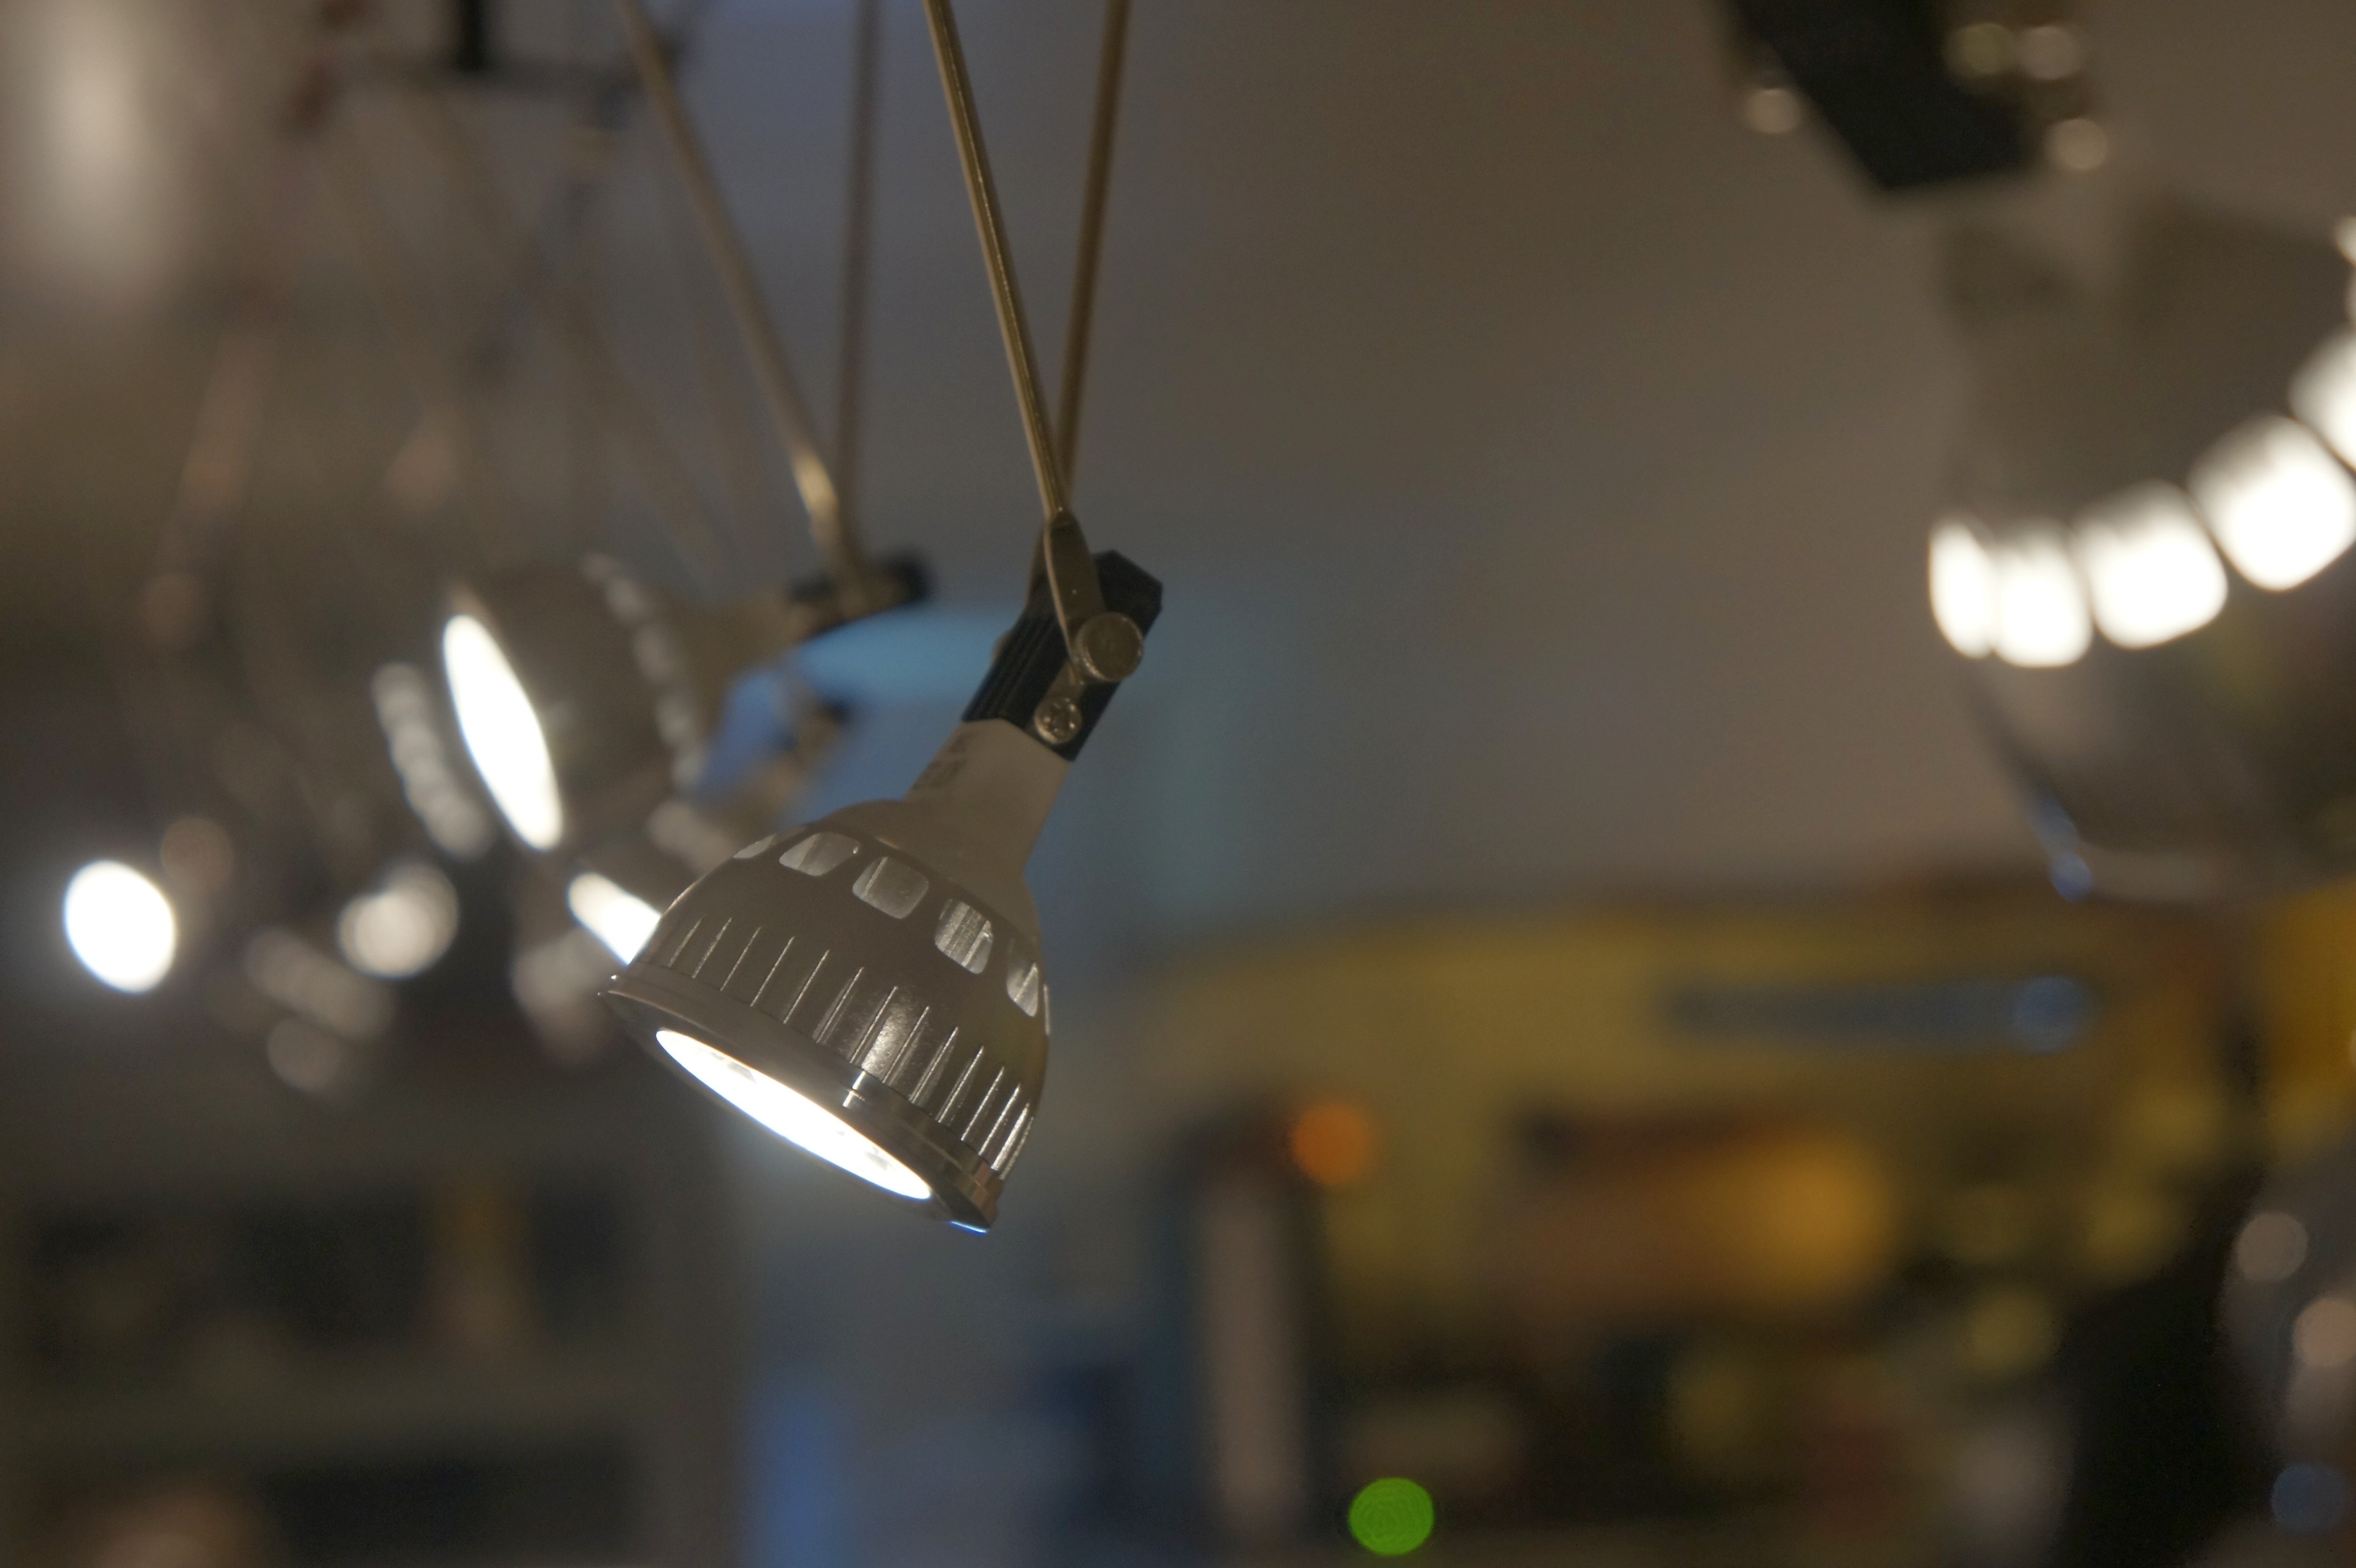
Progress has moved on and while fluorescent lights still have a lead in maximum luminous efficacy (lm/w), for example the GE Ecolux Watt-Miser puts out 111 lm/W, they’re less versatile than LEDs and installation is a hassle while low voltage LEDs are easy to install and look cool.
System Design
The goal of this project was to add dimmable, pleasing light to the kitchen that I found aesthetically interesting. I wanted a decent color rendering index (CRI), ease of installation, and at reasonable cost. I’ve always liked the look of cable lighting and the flexibility of the individual, adjustable luminaires.
I couldn’t find much information on how variable output LEDs work and what can be used to drive them. I have a pretty good collection of high quality power supplies, which I wanted to take advantage of, but wasn’t sure if I’d be able to effectively dim the bulbs from the documentation I found. So I did some tests.
Test Configuration
I bought a few different 12V, Dimmable LEDs and set up a test configuration to verify operation and output with variable voltage and variable current. The one bit of data I had was that using standard commercial controllers, the lowest output is typically stated to be around 70% of maximum output: that is the dimming range is pretty limited with standard (PWM/Transformer) controllers. The results I found were much more encouraging, but revealed some quirks.
I used a laboratory-grade HP power supply with voltage and current control to drive the LEDs, decent multimeters to measure voltage and current, and an inexpensive luminance meter to measure LED output.
I measured 3 different LEDs I selected based on price and expected compatibility with the aesthetics of the project and because they looked like they’d have different internal drivers and covered a range of rated wattage.
Test Results
These bulbs have internal LED controllers that do some sort of current regulation for the diodes that results in a weird voltage/current/output response. Each bulb has a different turn-on voltage, then responds fairly predictably to increasing input voltage with increasing output, reaches the controller stabilizing voltage and runs very inefficiently until voltage gets over the rated voltage and then becomes increasingly efficient until, presumably, at some point the controller burns out. I find that the bulbs all run more efficiently at 14V than at the rated 12V.
As a side note, to perform the data analysis, I used the excellent xongrid plugin for excel to perform Kriging interpolation (AKA Gaussian process regression) to fit the data sets to the graphing function’s capabilities. The graphs are generated with M-Chart and the table with TablePress.
Watts v. Volts
This chart shows the wattage consumed by each of the three LEDs as a function of input voltage, clearly demonstrating both that the power consumption function is non-linear and that power consumption in watts improves when driven over the rated 12V. Watts are calculated as the product of the measured Volts * Amps. Because of the current inversion that happens as the controllers come fully on-line, these LEDs can’t be properly controlled near full brightness with a current-controlled power supply, though it works well to provide continuous and fairly linear dimming at low outputs, once the voltage/current function changes slope, the current limiting controller in the power supply freaks out.
Lux v. Volts
This chart shows the lux output by each of the three LEDs as a function of input voltage, revealing the effect of the internal LED driver coming on line and regulating output, which complicates controlling brightness but protects the LEDs. The 5W LEDs have a fairly gentle response slope and start a very low voltage (2V) so are a good choice for a linear power supply. The 4W LEDs don’t begin to light up until just over 6V, and so are a good match for low-cost switch mode supplies that don’t go to zero.
Lux/W v. Volts
This chart shows the luminous efficiency (Lux/Watt, Lumen measurement is quite complicated) by each of the three LEDs as a function of input voltage, showing that overdriving the LEDs past the rated 12V can significantly improve efficiency. There’s some risk it will overheat the controller at some point and result in failure. I’ll update this post if my system starts to fry LEDs, but my guess is that 14V, which cuts the power load by 20% over 12V operation with the 7.5W lamps I selected, will not significantly impact operational lifetime.
Update: This system has been running for 7 years now. In that time two linear power supplies have failed (they were fairly inexpensive models as such things go). The LED modules had a high infant mortality rate: 2-3 failed in the first few months, another one failed just about every 6 months for the first couple of years. I think it has been 4 years since the last one failed. This implies that longevity is primarily a function of build quality, which varies.
Total System Efficiency
The emitter efficiency is relatively objective, but the total system efficiency includes the power supply. I used a Daiwa SS-330W switching power supply I happened to have in stock to drive the system, which cost less than a dimmable transformer and matching controller, and should be significantly higher quality. The Daiwa doesn’t seem to be easily available any more, but something like this would work well for up to 5A total load and something like this would handle as many as 40 7.5W LEDs on a single control, though the minimum 9V output has to be matched to LEDs to get satisfactory dimming. It is important not to oversize the power supply too much as switch mode supplies are only really efficient as you get close to their rated output. An oversized switchmode power supply can be extremely inefficient.
With the Daiwa, driving 13 7.5W LEDs, I measured 8.46A at 11.94V output or 101 Watts to brightly illuminate the entire kitchen, and providing far more light than 400W of total halogen lights. I measured the input into the power supply at 0.940A at 121.3V or 114 Watts. That means the power supply is 88.6% efficient at 12V, which is more or less as expected for a variable output supply.
Increasing the output voltage to 14.63 Volts lowered the output current to 5.35A or 78 Watts without lowering the brightness at the installation; I measured at 168 lux at both 12.0V at 14.6V. The input current at 14.63V dropped to 0.755A or 91.6 Watts, meaning the power supply is slightly less efficient at lower output currents (as is usually the case).
- Overdriving the 12V rated LEDs to 14.63V improves plug efficiency by 20%.
At the low end, the SS-330W’s minimum output is 4.88V, which yields 12 lux at the counter or a 14x dimming ratio to 7% of maximum illumination, a far better range than is reported for standard dimmer/transformer combinations.
Parts
- 7.5W LED modules from JackyLED
- Daiwa power supply (alternate version)
- 16 gauge speaker cable
- MR-16 cable lamp mounts
- Digital light meter
Raw Data:
(MS Excel file, you will need the xongrid plugin to update the data as rendered in the graphs)
Speaker Build
In December of 2002 (really, 2002, 12 years ago (OMG, >20 years ago)), I decided that the crappy former Sony self-amplified speakers with blown amplifiers that I had wired into my stereo as surround speakers really didn’t sound very good as they were, by then, 7 years old and the holes in the plastic housing where the adjustment knobs once protruded were covered by aging gaffers tape.
At least it was stylish black tape.
I saw on ebay a set of “Boston Acoustics” woofers and tweeters back in the time when ebay prices could be surprisingly good. Boston Acoustics was a well-respected company at the time making fairly decent speakers. 36 woofers and 24 tweeters for $131 including shipping. About 100 lbs of drivers. And thus began the execution of a fun little project.
Design Phase: 2003-2011
I didn’t have enough data to design speaker enclosures around them, but about a year later (in 2003), I found this site, which had a process for calculating standard speaker properties with instruments I have (frequency generator, oscilloscope, etc.) I used the weighted diaphragm method.
WOOFER: PN 304-1150001-00 22 JUL 2000
80MM CONE DIA = 8CM
FS  = 58HZ
RE  = 3.04 OHMS
QMS = 1.629
QES = 0.26
QTS = 0.224
CMS = 0.001222
VAS = 4.322 (LITERS) 264 CUBIC INCHES
EBP = 177.8

NOMINAL COIL RESISTANCE @ 385HZ (MID LINEAR BAND) 3.19 OHMS
NOMINAL COIL INDUCTANCE (@ 1KHZ) 0.448 MHENRY
TWEETER: PN 304-050001-00 16 OCT 2000
35MM CONE DIA
FS  = 269HZ
RE  = 3.29 OHMS
QMS = 5.66
QES = 1.838
QTS = 1.387
CMS = 0.0006
VAS = 0.0778 (LITERS)
EBP = 86.7

NOMINAL COIL RESISTANCE @ 930HZ (MID LINEAR BAND) 3.471 OHMS
NOMINAL COIL INDUCTANCE (@ 1KHZ) 0.153 MHENRY
Awesome. I could specify a cross over and begin designing a cabinet. A few years went by…
In January of 2009 I found a good crossover at AllElectronics. It was a half decent match and since it was designed for 8 ohm woofers, I could put two of my 4 ohm drivers in series and get to about the right impedance for better power handling (less risk of clipping at higher volumes and lower distortion as the driver travel is cut in half, split between the two).
https://web.archive.org/web/20120904083243/http://www.allelectronics.com:80/make-a-store/item/XVR-21/2-WAY-CROSSOVER-INFINITY/1.html
CROSS OVER FREQUENCY
3800HZ CROSSOVER
LOW-PASS: 18DB, 8 OHM
HIGH-PASS: 18DB, 4 OHM
Eventually I got around to calculating the enclosure parameters. I’m not sure when I did that, but sometime between 2009 and 2011. I found a site with a nice script for calculating a vented enclosure with dual woofers, just like I wanted and got the following parameters:
TARGET VOLUME 1.78 LITERS = 108 CUBIC INCHES

DRIVER VOLUME (80MM) = 26.25 CUBIC INCHES = 0.43 LITERS
CROSS OVER VOLUME = 2.93 CUBIC INCHES = 0.05 LITERS
SUM = 0.91 LITERS
1" PVC PORT TUBE: OD = 2.68CM, ID = 2.1CM = 3.46 CM^2
PORT LENGTH = 10.48CM = 4.126"


WIDTH = 12.613 = 4.829"
HEIGHT = 20.408 = 7.82"
DEPTH = 7.795 = 3"
In 2011 I got around to designing the enclosure in CAD:
There was no way to fit the crossover inside the enclosure as the drivers have massive, magnetically shielded drivers, so they got mounted on the outside. The speakers were designed for inside mounting (as opposed to flange mounting) so I opted to radius the opening to provide some horn-loading.
I also, over the course of the project, bought some necessary tools to be prepared for eventually doing the work: a nice Hitachi plunge router and a set of cheap router bits to form the radii and hole saws of the right size for the drivers and PVC port tubes.
Build Phase (2014)
This fall, Oct 9 2014, everything was ready and the time was right. The drivers had aged just the appropriate 14 years since manufacture and were in the peak of their flavor.
I started by cutting down some PVC tubes to make the speaker ports and converting some PVC caps into the tweeter enclosure. My first experiment with recycled shelf wood for the tweeter mounting plate failed: the walls got a bit thin and it was clear that decent plywood would make life easier. I used the shelf wood for the rest of the speaker: it was salvaged from my building, which was built in the 1930s and is probably almost 100 years old. The plywood came with the building as well, but was from the woodworker who owned it before me.
I got to use my router after so many years of contemplation to shape the faceplates, fabricated from some fairly nice A-grade plywood I had lying around.
Once I got the boxes glued up, I installed the wiring and soldered the drivers in. The wood parts were glued together with waterproof glue while the tweeters and plastic parts were installed with two component clear epoxy. The low frequency drivers had screw mounting holes, so I used those in case I have to replace them, you know, from cranking the tunage.
I lightly sanded the wood to preserve the salvage wood character (actually no power sander and after 12 years, I wasn’t going to sand my way to clean wood by hand) then treated them with some polyurethane I found left behind by the woodworker that owned the building before I did. So that was at least 18 years old. At least.
I supported the speakers over the edge of the table to align the drivers in the holes from below.
The finished assembly looked more or less like I predicted:
Testing
The speakers sound objectively quite nice, but I was curious about the frequency response. To test them I used the pink noise generator in Audacity to generate 5.1 6 channel pink noise files which I copied over to the HTPC to play back through my amp. This introduces the amp’s frequency response, which is unlikely to be particularly good, and room characteristics, which are certainly not anechoic.
Then I recorded the results per speaker on a 24/96 Tascam DR-2d recorder, which also introduces some frequency response issues, and imported the audio files back into Audacity (and the original pink noise file), plotted the spectrum with 65536 poles, and exported the text files into excel for analysis.
Audacity’s pink noise looks like this:

It’s pretty good – a bit off plan below 10 Hz and the random noise gets a bit wider as the frequency increases, but it is pretty much what it should be.
First, I tested one of my vintage ADS L980 studio monitors. I bought my L980s in high school in about 1984 and have used them ever since. In college I blew a few drivers (you know, cranking tunage) but they were all replaced with OEM drivers at the Tweeter store (New England memories). They haven’t been used very hard since, but the testing process uncovered damage to one of my tweeters, which I fixed before proceeding.
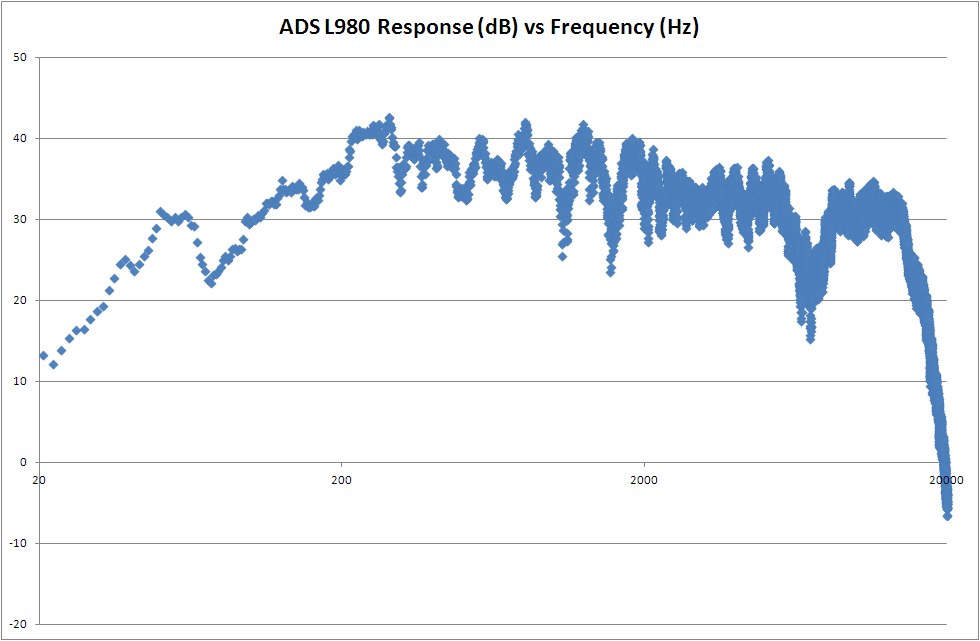
The ADS L980 has very solid response in the low frequency end with a nicely manufactured 12″ woofer and good high end with their fancy woven tweeter. A 3 way speaker, there are inevitably some complexities to the frequency response.
I also tested my Klipsch KSC-C1 Center Channel speaker (purchased in 2002 on ebay for $44.10) to see what that looked like:
It isn’t too bad, but clearly weaker in the low frequency, despite moderate sized dual woofers and with a bit of a spike in the high frequency that maybe is designed in for TV and is perhaps just an artifact of the horn loaded tweeter. It is a two way design and so has a fairly smooth frequency response in the mid-range, which is good for the voice program that a center speaker mostly carries.
And how about those new ones?
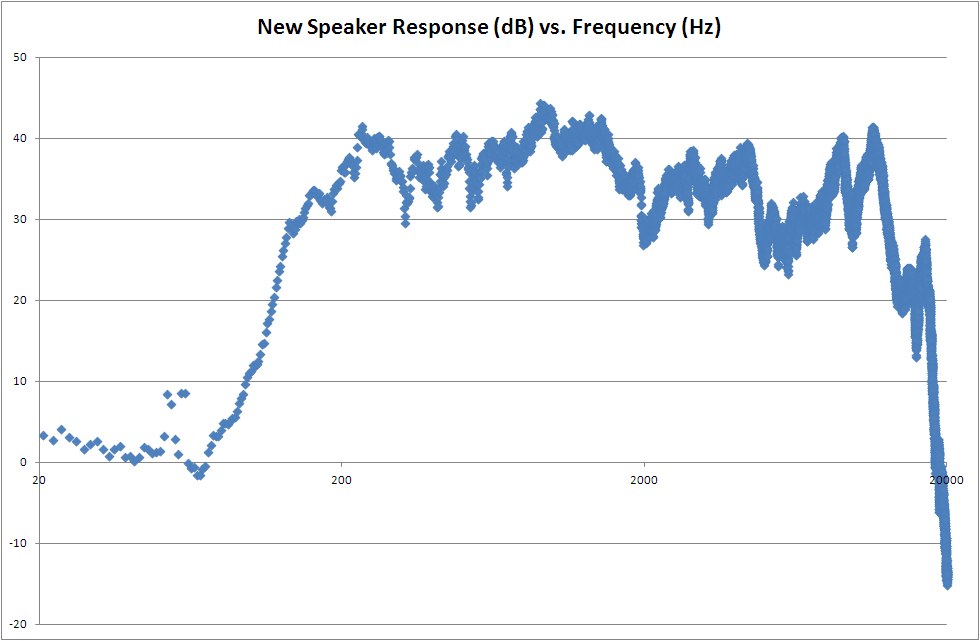
Well… not great, a little more variability than one would hope, and (of course) weak below about 100Hz. I’m a little surprised the tweeters aren’t a little stronger over about 15kHz, though while that might have stood out to me in 1984, it doesn’t now. Overall the response is quite good for relatively inexpensive drivers, the low frequency response, in particular, is far better than I expected given the small drivers. The high frequency is a bit spiky, but quite acceptable sounding.
And they sound far, far better than the poor hacked apart Sony speakers they replaced.
Raw Data
The drawings I fabricated from and the raw data from my tests are in the files linked below:
Robin’s yellow pickup circa 1985
An high school friend of mine asked if I had any pictures of our old Turbo Pinto, and alas, I do not think I do. But I did remember some pictures of the even more entertaining conversion of Raab’s (he was into Saabs at the time) pickup truck into the super sport truck pictured here. The black and red details I remember painting, but I think it came yellow, Rob’s favorite color for cars due, I believe, to some line in a song that went “inside the walls of the citadel, yellow chariots race.”
Ah yes, classic brain sludge.
I fabricated that roll bar at Greg Leavit’s place and welded it into Rob’s truck for him after his mom worried that these particular vehicles were prone to roll-over accidents and tended to smoosh the occupants as the cab wasn’t particularly well reinforced. Back then, light trucks were considered work vehicles and didn’t have to meet car safety standards.
Rob’s mom’s fears turned out to be well-founded when Rob rolled the truck into a ditch in a late-night end-of-school-year drive home from college. He was fine, but the truck was totaled and lives now, only in our memories (to quote another movie favorite of ours from the era).


Cats and Crafts

Fixed Graphics Card
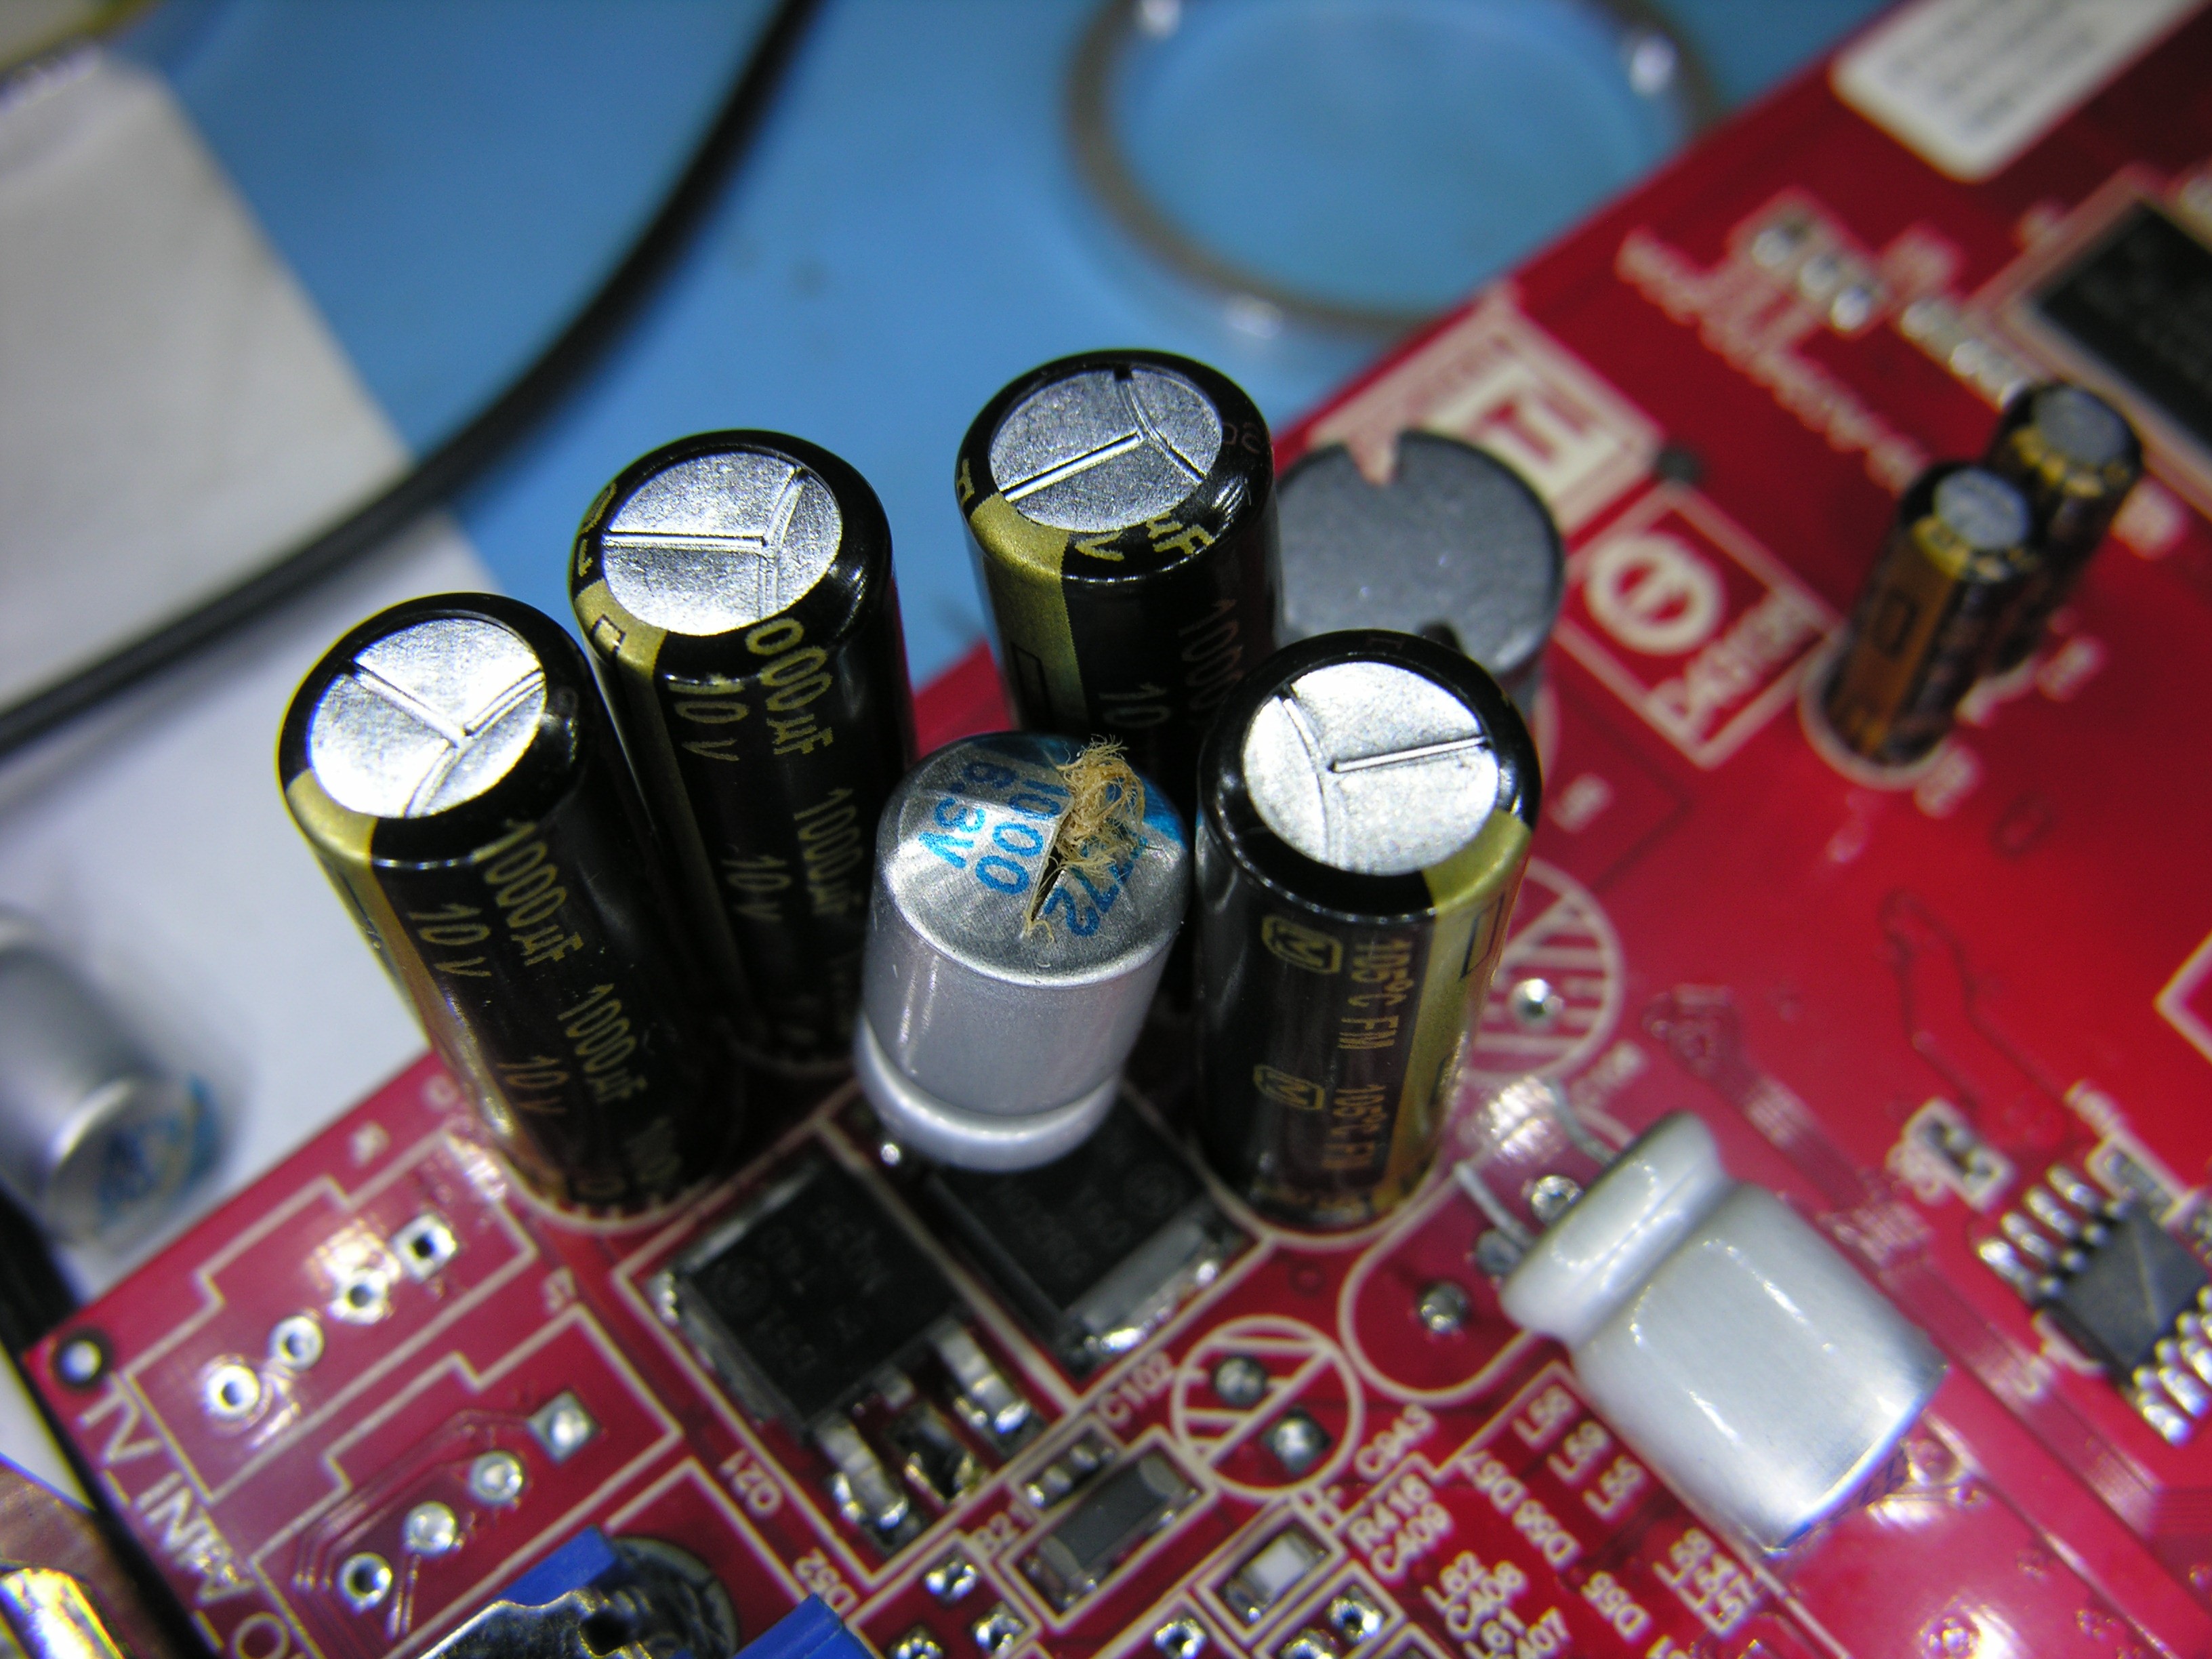 Seven New Capacitors, some desoldering (one replacement solder sucker), and a little soldering back and the card is better than new. Note the 10V upgrade too. They’re a little tall, but AGP cards usually have plenty of room. The extra headroom cost several cents.
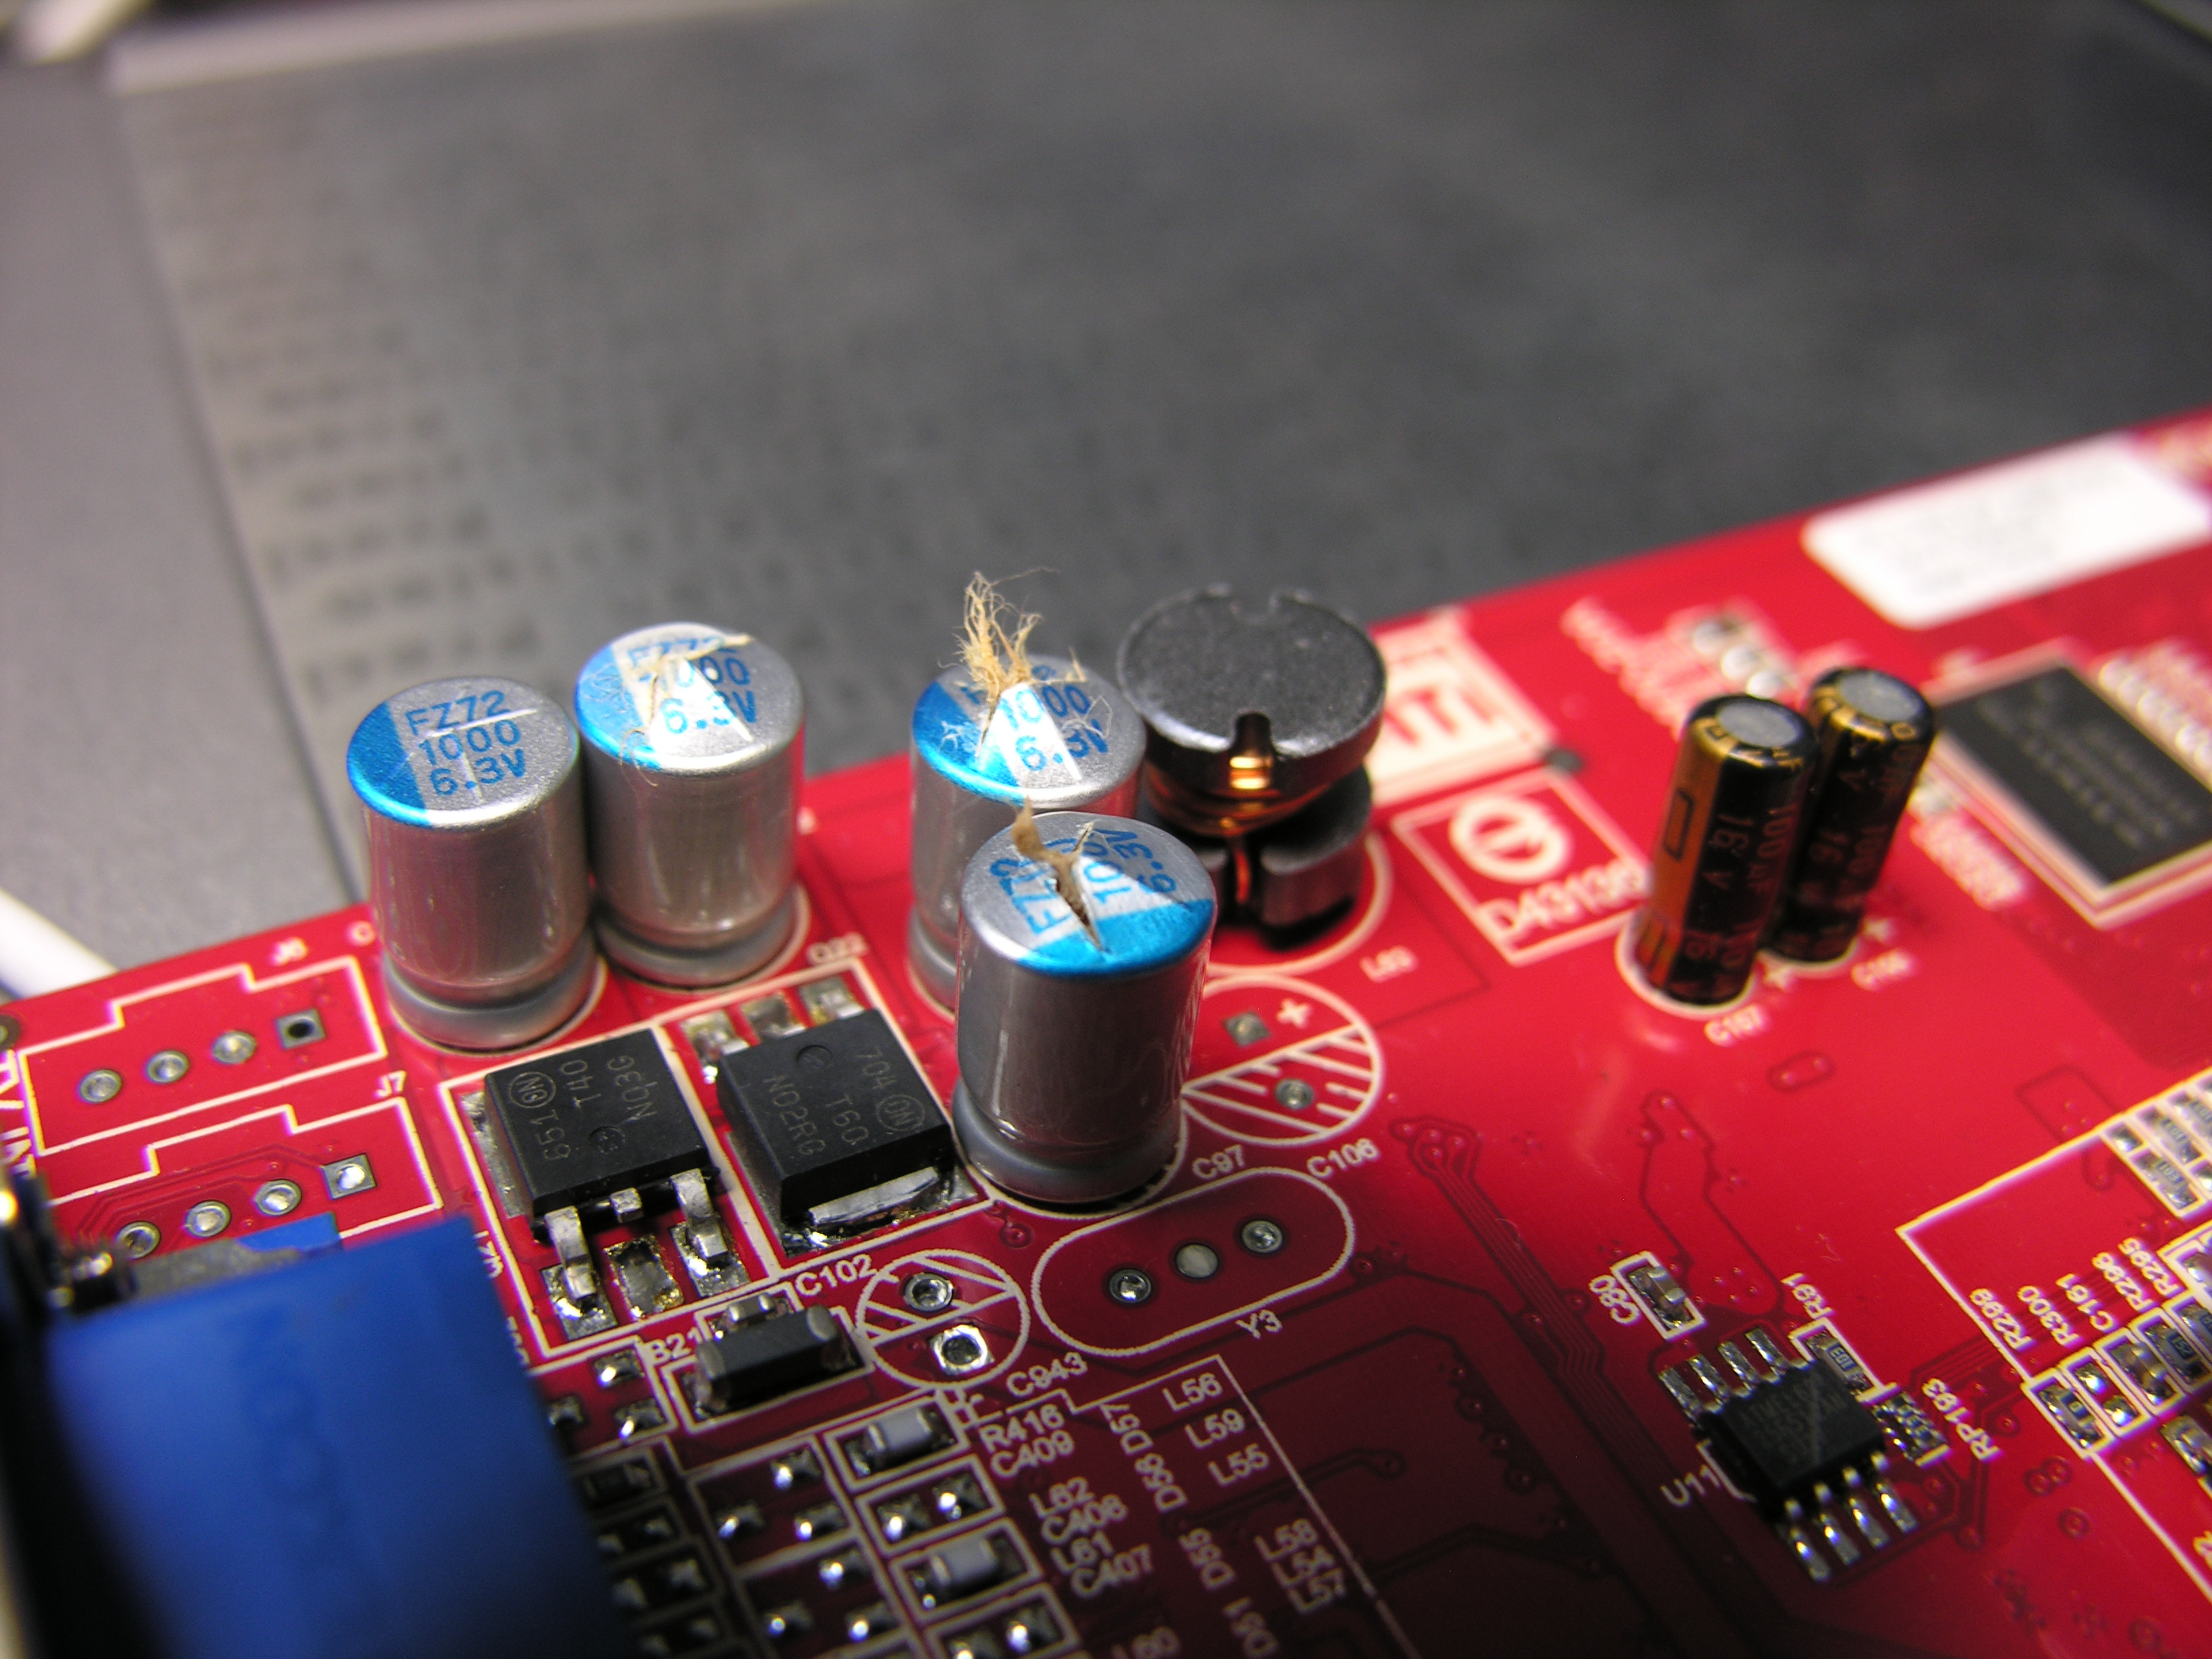
 If you discover that your silvery FZ (saicon) caps are blown up, just replace em. It’s part of the adventure of modern computing.
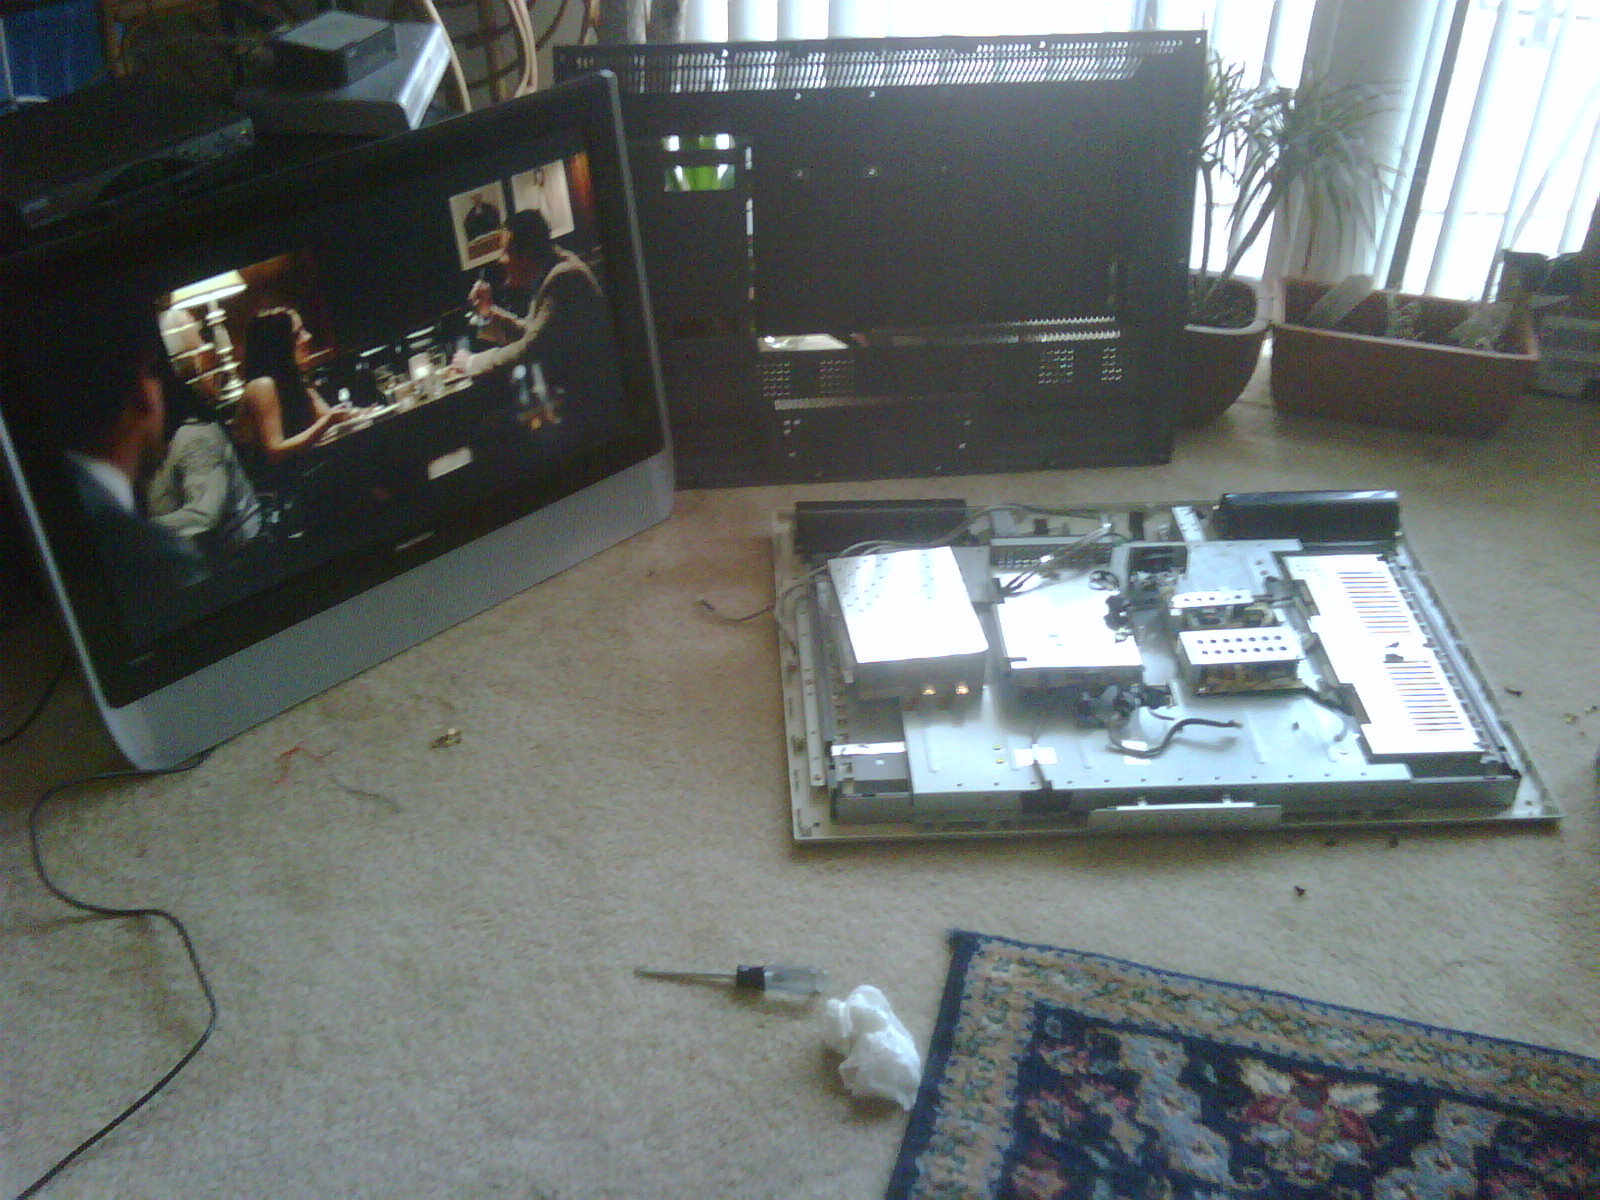
Successful TV surgery!
John and I swapped parts from two he found and got one that worked and a collection of moar parts!
Could This Have Anything To Do With It?
Why isn’t my graphics card working any more? Could it be that the fluff has escaped from the cans? The alien chest bursters have fled their little cages? Nobody’s left to paint the pixels except that one, and it’s only still there because it was always the lazy one.
Update: I got the caps but my solder sucker exploded so I had to replace it before continuing. Those springs go a long way…
Update 2: Fixed.
BMW 325 e36 Comfort Relay Fix
Our BMW’s windows started to get flaky. They wouldn’t move for a few minutes after the car started, but eventually worked normally, an annoying intermittent problem that wasn’t worth a trip to the repair shop in the hope they wouldn’t work for the mechanic.
I checked the fuse under the hood (#33, 10A) and poked the baby-head-crush safety breaker a few times to no avail.
Then, last night, the windows stopped moving all together. Testing as advised, neither did the sunroof. I found this link and decided it was probably my comfort relay too. This page had a nice list of resources, but the best is gone and only partially available on the internet archive so here’s what I did (and, not to spoil the suspense, this worked).
The panels you need to remove are under the steering wheel. You’re looking at them if you’re lying on your back in the driver’s side foot well, looking up at the bottom of the dashboard. You will need to get through two layers of material to remove the relay, the plastic cover and an aluminum crush panel that protects your knees in a crash. You will need the following tools:
- #2 Philips screwdriver
- Small (1/4″ or so) flat screw driver
- 10mm socket
- Socket extension
- Socket wrench
- Soldering iron
- Solder
First remove the plastic panel
Step 1 – remove the plastic cover that hides an unsightly screw head with the flat screw driver. You just pry it off.

Step 2 – Remove the now-exposed screw, one of three holding the plastic panel in place.

Step 3 – Remove screw two of three.

Step 4 – Remove Screw three of three. The panel should now sort of flop a bit, but it is still retained by a tight fit and two clips between the dash and the driver’s door.

Step 5 – Pull the plastic panel straight aft, releasing the clips shown and remove it. There is a speaker attached to the plastic panel attached by some wires. If the speaker doesn’t pop out of it’s own accord, you can either pull it out or release the wires.

Step 6 – Remove the knee panel with the 10mm socket. The heads are recessed so you will either need a long socket or an extension to reach them. There are three bolts holding the panel in. As it is removed, lower it gently, there is a metal bracket clamped between the panel and the dash structure that will be loose now.

Step 7 – A previous mechanic had solved the assembly problem of the loose mechanical bracket with some electrical tape. This seemed to work well and made reassembly easy.

Step 8 – Remove the blue comfort relay. This is a bit tedious as I did not remove the bracket first – rather wiggled it out of it’s mount. There are two retaining clips that I depressed that may have aided removal (or not). The relay is pulled “up” – away from the ground and up into the tangle of the dash. This is probably the most tedious step, it is all easy from here.

Step 9 – The comfort relay removed. You can replace it or fix it. If you fix it, pry open the case with your flat screw driver by popping the clips on either side and sliding the blue cover off.

Step 10 – Identify the bad joint. Like other people have found, mine was cracked all the way around.

Step 11 – Solder the joint back together. I was generous with the solder so it might last another 200,000 miles.

Step 12 – After putting the relay back, reinstalling the knee panel, and mostly replacing the plastic panel, snap the speaker back into the back-side (inside) of the plastic panel then replace the screws and cover the unsightly head of the visible one with the plastic bit.

Windows go up. Windows go down.
Magnetically Stirred Coffee
Tastes like science! Mmmmm. Good science! Next, instrument with a temp controller to monitor and shut off automatically.
